> ## Documentation Index
> Fetch the complete documentation index at: https://docs.unvest.io/llms.txt
> Use this file to discover all available pages before exploring further.
# Create a staking pool with rewards that vest over time, or unlock at a set date
> In this tutorial, we will show you how to create a staking pool where users can earn vestingTokens as a reward for staking.
Using a vestingToken as the reward token in a staking pool can be a powerful way to encourage long-term holding and reduce the immediate impact of inflation on circulating supply. When users receive a vestingToken as a reward, they are unable to sell it until it unlocks, meaning that the tokens remain locked up for a certain period of time.
This can be beneficial for projects that want to minimize the impact of new token issuance on the market and encourage a more stable price.
*If you haven't yet created a vestingToken, first follow the steps outlined in this tutorial:*
**When you're ready, follow these steps to create your staking pool:**
1. Navigate to the "Staking Pools" page in the Unvest app.
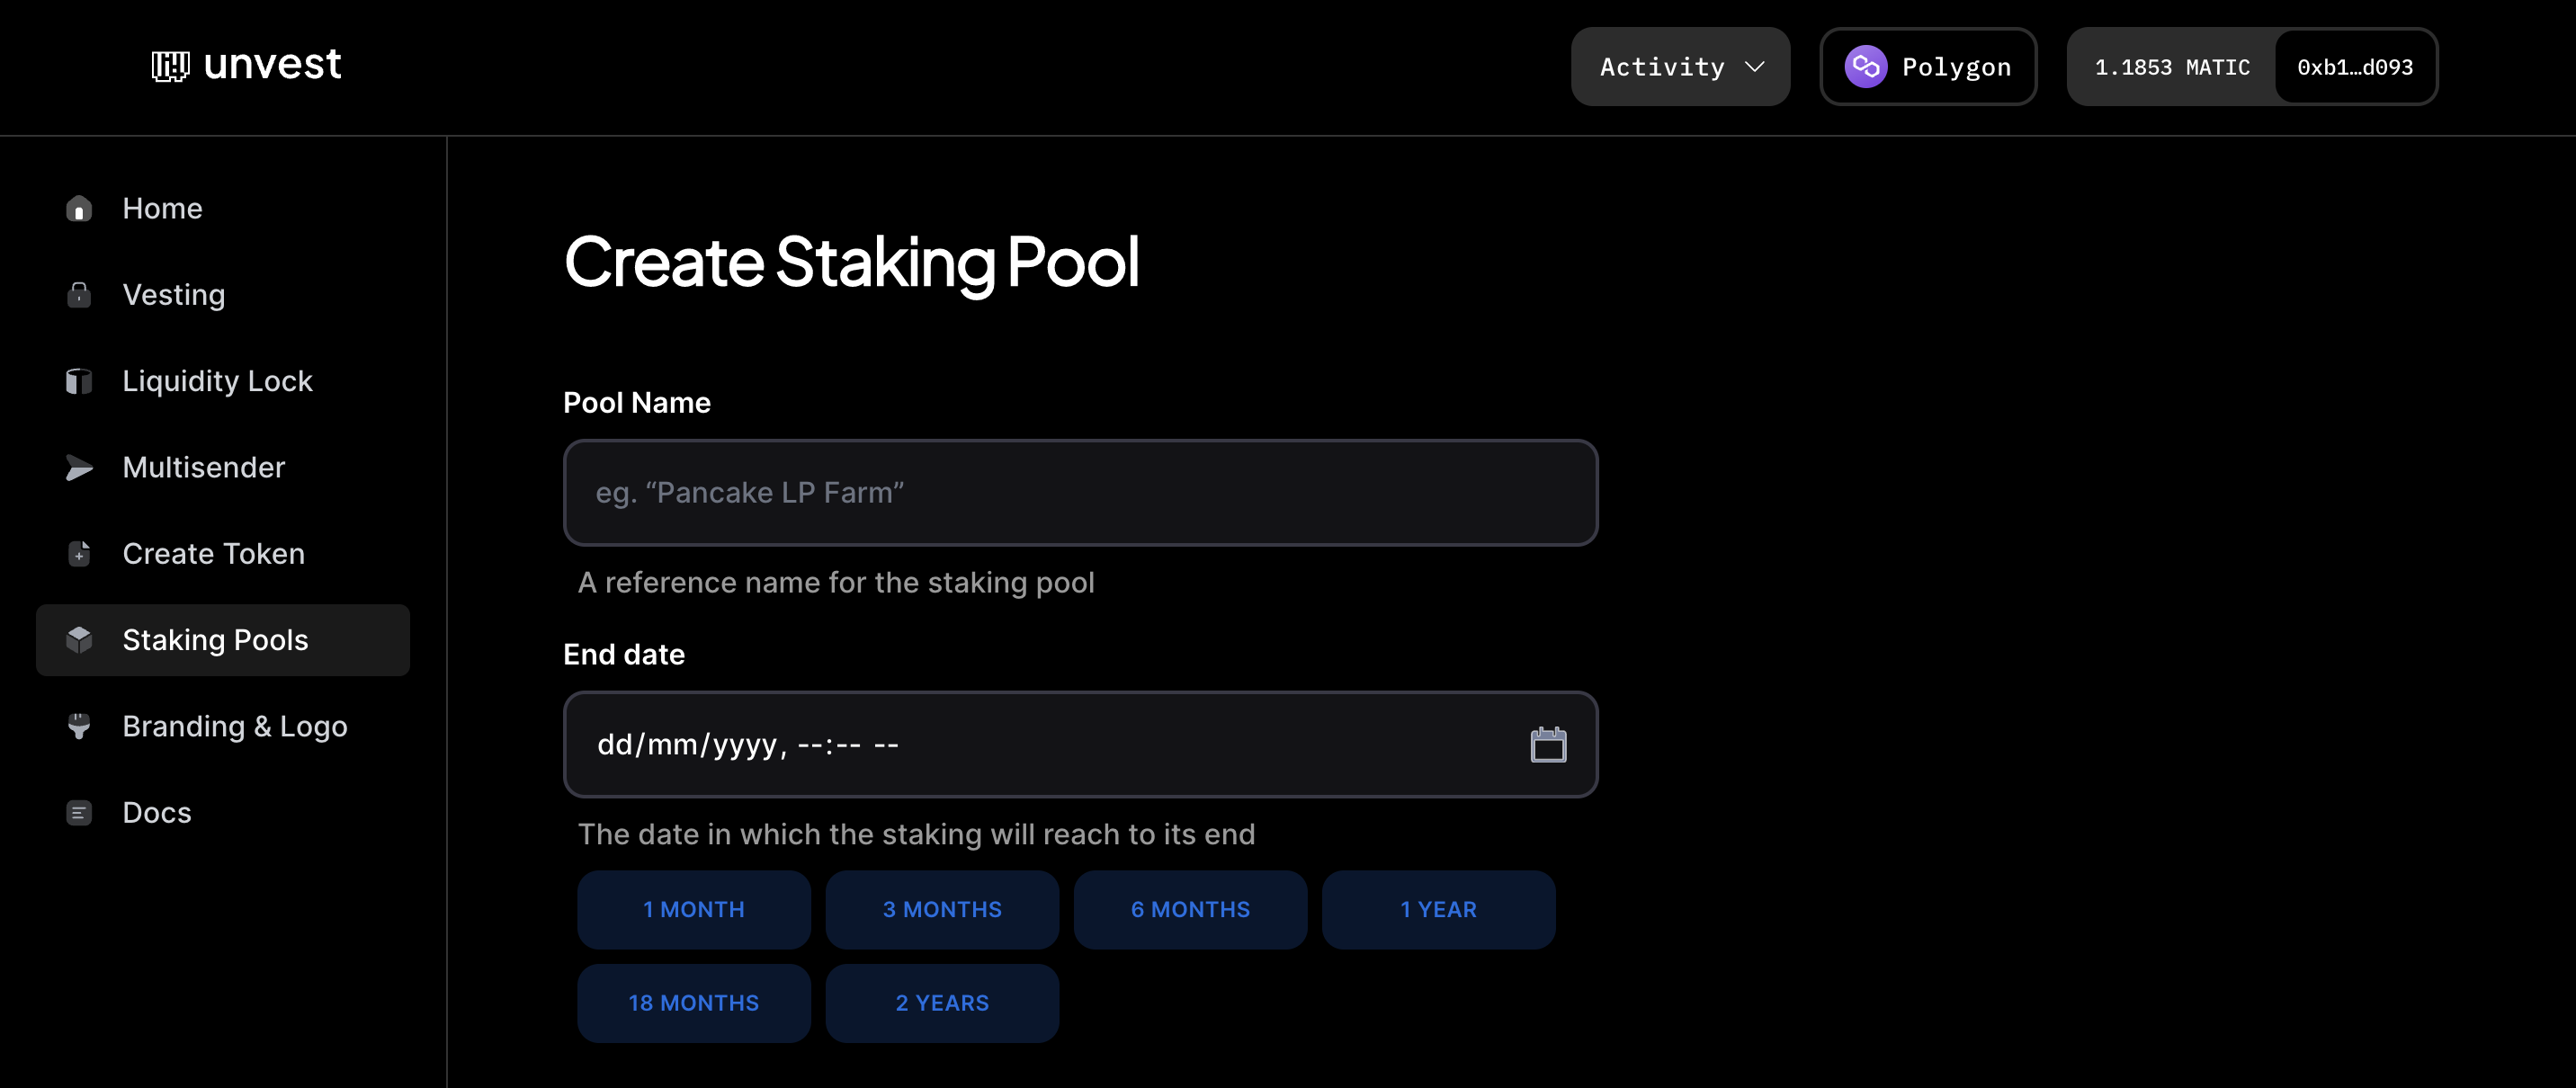 2. In the "Pool Name" field, enter a reference name for the staking pool.
3. In the "End Date" field, select the date when the staking will end.
4. In the "Staking Token Address" field, enter the address of the asset that will be deposited into the pool. This will usually be your unlocked project token.
2. In the "Pool Name" field, enter a reference name for the staking pool.
3. In the "End Date" field, select the date when the staking will end.
4. In the "Staking Token Address" field, enter the address of the asset that will be deposited into the pool. This will usually be your unlocked project token.
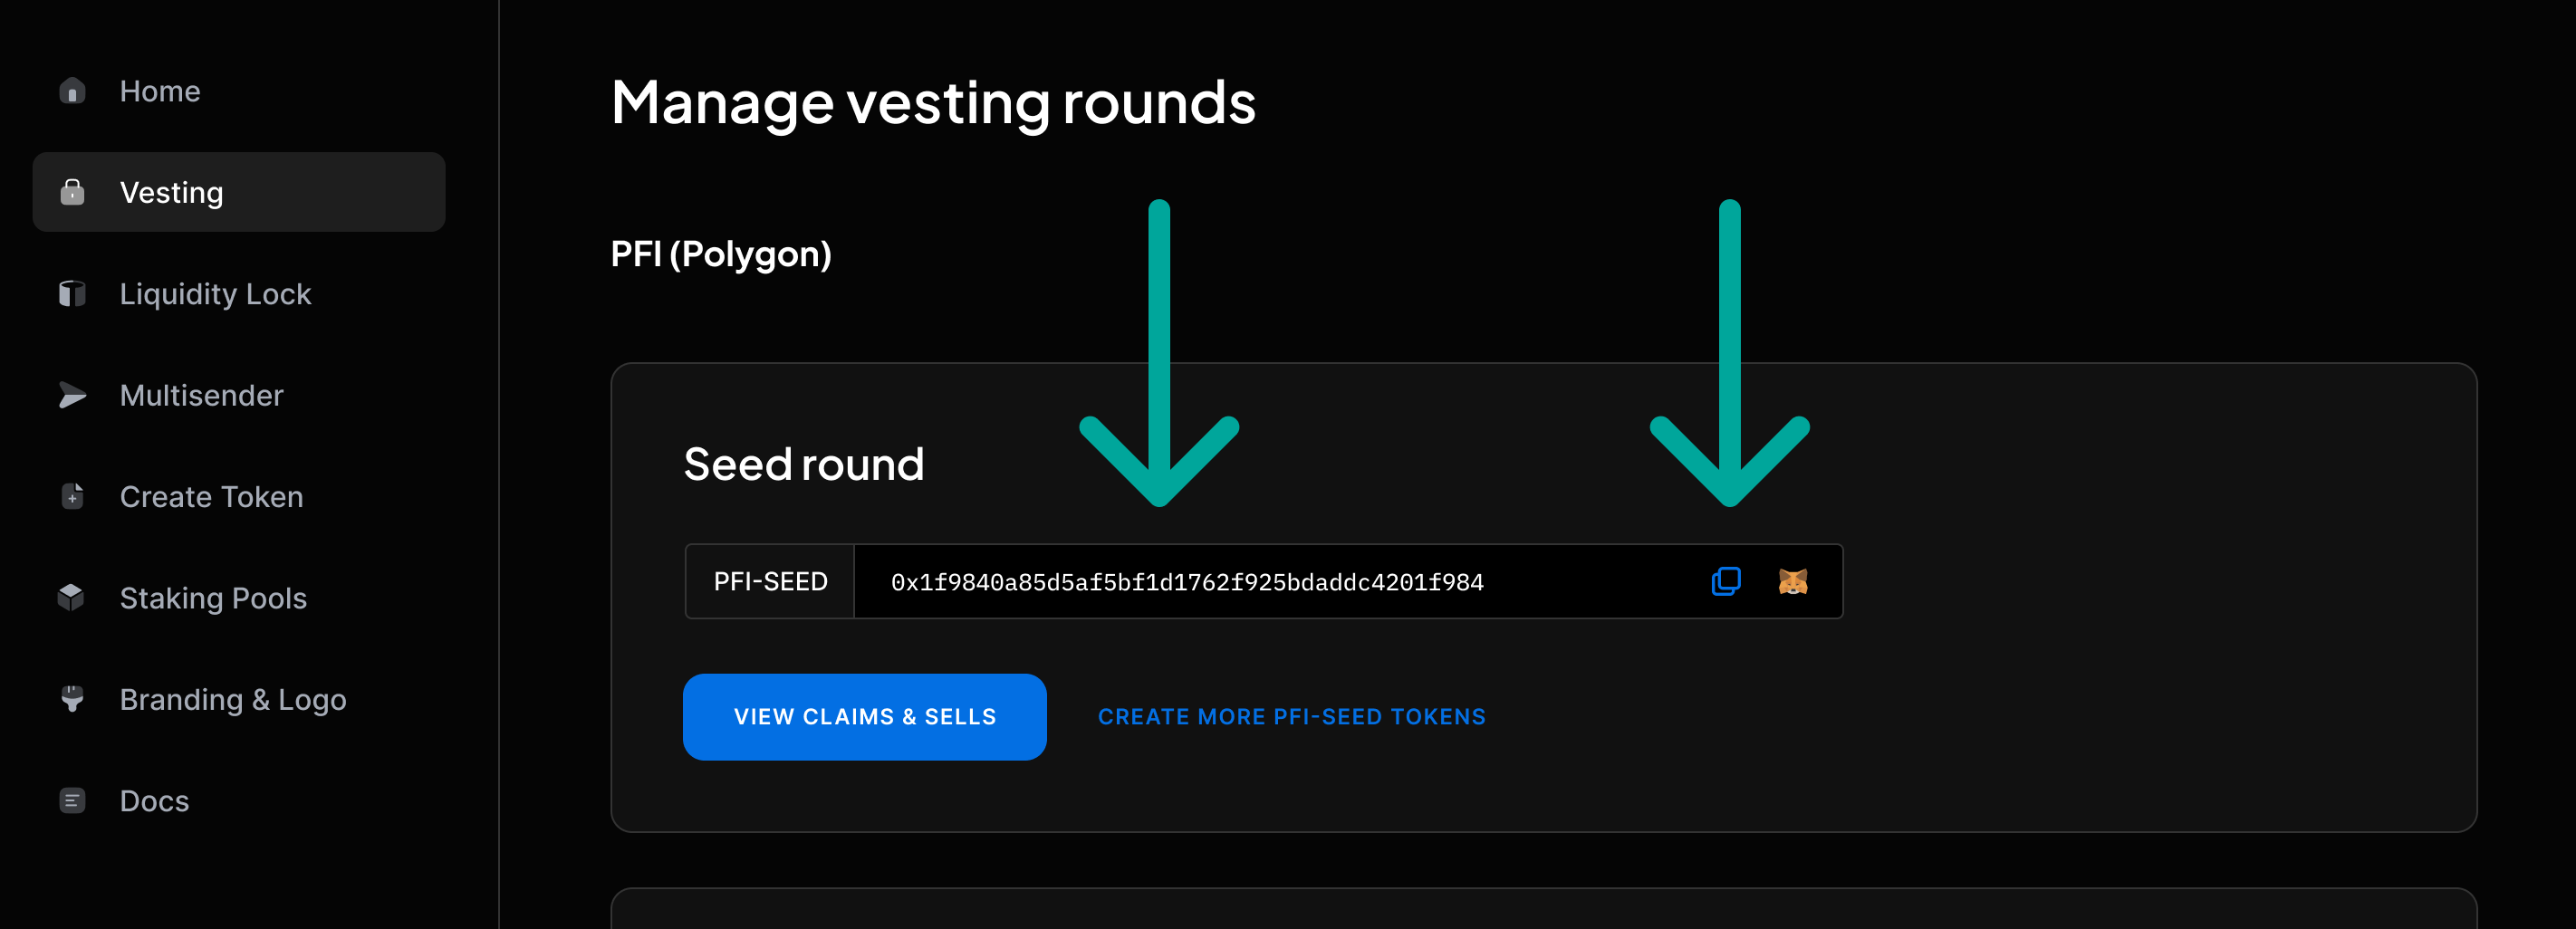
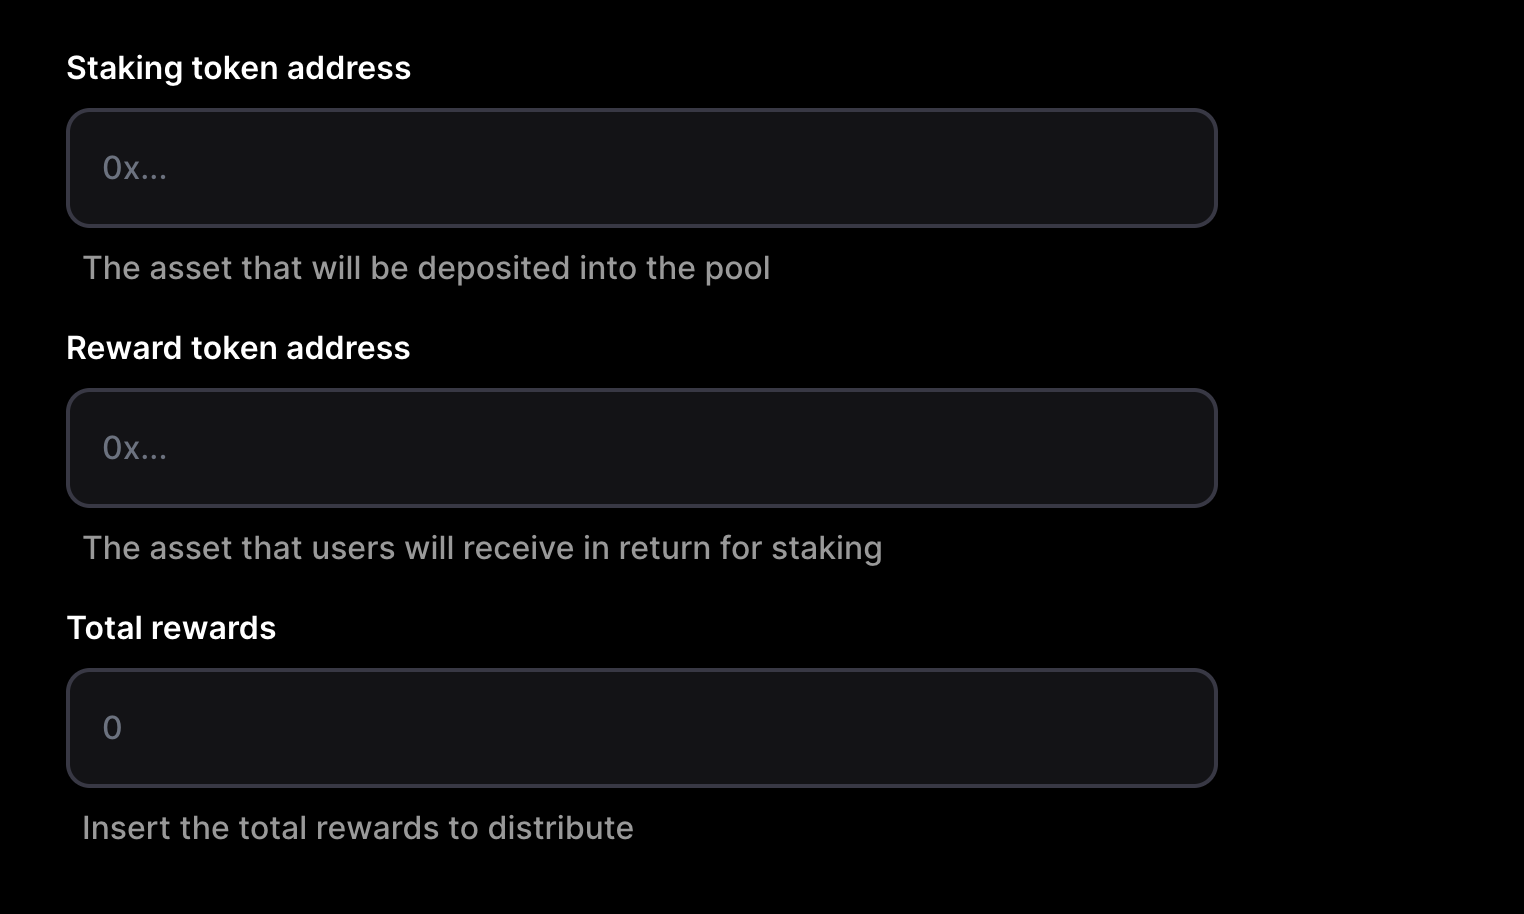 5. In the "Reward Token Address" field, enter the address of the vestingToken that users will receive as a reward for staking. You can get the vesting token address from your Project dashboard.
 6. In the "Total Rewards" field, enter the total amount of vestingTokens to be distributed as a reward.
7. Click the "Create Pool" button.
8. You will be prompted to submit a transaction to the blockchain to create the staking pool. Make sure you have sufficient balance in your wallet to cover the gas fees for this transaction.
9. Once the transaction has been successfully mined, the staking pool will be created, and users will be able to stake their assets in exchange for vestingTokens.
Congratulations! You have successfully created a staking pool where users can earn vestingTokens as a reward for staking.
It is important to carefully consider the terms of the vesting schedule when using vestingTokens in this way, as the length of the unlock period and the unlock rate can have a significant impact on the overall economics of the system.
6. In the "Total Rewards" field, enter the total amount of vestingTokens to be distributed as a reward.
7. Click the "Create Pool" button.
8. You will be prompted to submit a transaction to the blockchain to create the staking pool. Make sure you have sufficient balance in your wallet to cover the gas fees for this transaction.
9. Once the transaction has been successfully mined, the staking pool will be created, and users will be able to stake their assets in exchange for vestingTokens.
Congratulations! You have successfully created a staking pool where users can earn vestingTokens as a reward for staking.
It is important to carefully consider the terms of the vesting schedule when using vestingTokens in this way, as the length of the unlock period and the unlock rate can have a significant impact on the overall economics of the system.